Soldering fine silver from precious metal clay to sterling silver can be quite tricky. Metal clay silver is porous and it sucks… literally, it sucks solder. Instead of flowing along the weld, solder just permeates through fine silver surface, contaminating the pure metal and leaving nasty stains. The most common advice is to burnish the fine silver surface as good as possible thus closing the pores. But it is only a part of the whole problem.
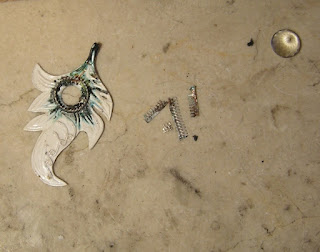 |
| Soldered bezel and bezel wreckage (to the right) |
Soldering a tiny sterling element, such as a bezel, to a massive fine silver piece presents even a greater challenge. Owing to the size difference, as well as the difference in melting temperatures of sterling and fine silver, the sterling silver bezel very often gets scorched before the fine silver piece is hot enough to let the solder flow. Using easy solder is not the right solution: it is known that hard solder is best for soldering fine silver based on precious metal clay.
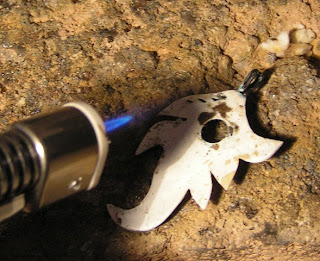 |
| Heating the reverse side of a piece |
How can you solve this problem? After having burned one bezel, I decided to approach the problem through the back door. Some soldering paste has been applied to the connection site between the bezel and the piece. Then the piece was flipped over so that the bezel was buried in the schamotte baking stone. With the bezel protected and the contact surface made tight in this way, I started heating the reverse side of the piece. I proceeded until the fine silver metal started to soften and ‘sweat’.
 |
| The pendant with soldered bezel |
Miraculously, the bezel has been soldered in this manner – and soldered well, too! Now it holds a gorgeous 1-cm large natural quartz stone. I called this pendant “Dew”, because the quartz reminds me of a water droplet on a leaf.
In this way the back door approach turned out to be quite successful!


Leave a Reply