Silver ring soldering, and soldering in general, are exciting topics to write about. I have already written a number of blogs on soldering. And the learning process still goes on. In this blog I would like to share my experience in step-by-step silver ring soldering
Before going into steps it is useful to know which types of silver solder are available on the market.
| Silver solder type | Melts between ( oC ) |
| Extra Easy | 667-709 |
| Easy | 705-723 |
| Medium | 720-765 |
| Hard | 745-778 |
| Extra hard* | 730-800 |
*Recommended for fine silver only, since sterling silver can get damaged at temps above 760 deg C .
All solder types should be available in your atelier. More types means more freedom and more possible steps in silver ring soldering. Rings are actually the jewelry pieces which require most assembling steps (as compared to pendants or earrings), because they consists of two main elements: the ring top and the ring shank. Each of these elements is in its turn an assembly, even the ring shank which may consist of several wires. This is why silver ring soldering sequence is so important.
The rule of the thumb is to plan the whole assembly of the silver ring soldering step by step starting with the hardest solder possible. You can draw a sequence with numbers and types of solder.
I always start with the ring top as being more challenging and more important for the general look of the ring. But one can also start with the shank. For rings with a stone I start with the bezel. I use the hardest possible solder to fasten the bezel ends together. Because the bezel solder joint is very sensitive to heat during subsequent soldering it would be better not to place it on a crtitical spot (such as close to the bail and other elements to be soldered later). Or protect it by wrapping during the subsequent soldering.
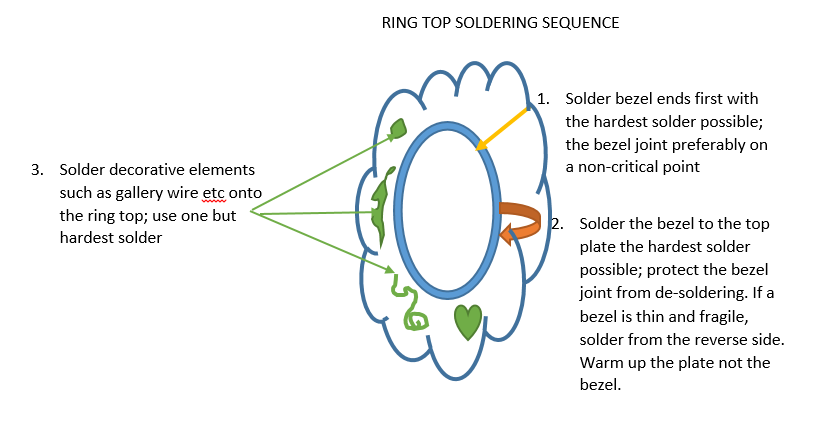
When the ring top is ready – clean and pickled and sure that all elements are fastened, I make the shank to size and then attach the shank to the top. There are two basic options to attach the ring top to the ring shank (see below).
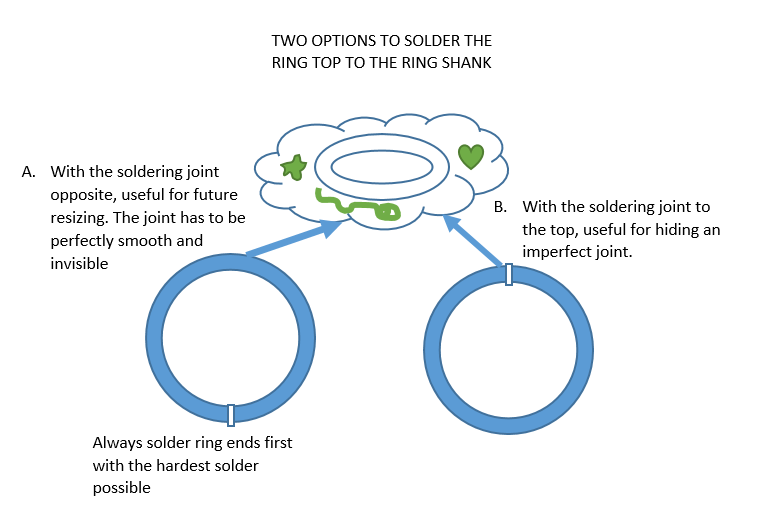
Whatever option you chose, make sure that this step is final. So you can relax and use the easy solder here. But I would leave the extra easy type just in case the ring will need to be repaired or resized in the future.
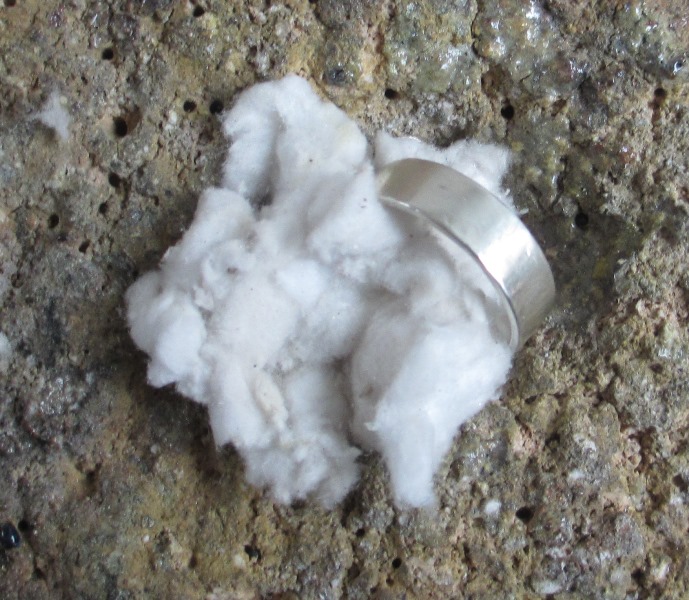
And what if you don’t have all these solder types available for the complete soldering sequence? There is always a possibility to protect the already present solder joints from de-soldering by wrapping them in heat resistant wool, covering with clay or other heat-resistant material – and then using the solder of the same hardness.
Read also this Great article on silver soldering
Leave a Reply