Since I started with precious metal clay silver I have always been curious about different types of clay, such as Bronze Clay. Experience with one type of clay definitely helps with another one. But each clay type has its own character.
The regular Bronze Clay takes many (!) hours to fire, so being impatient I have chosen the Fast Fire type of Bronze Clay. Here you can find all you need for a quick start with Bronze Clay. In fact, all the extra’s you need, if you worked with PMC before, are a dedicated set of files, separate jars for water and paste, and firing medium (activated carbon) in a stainless steel container. I had already ordered the firing utensils before for firing pmc pro. They could be re-used nicely for bronze clay projects. All shaping and carving tools used for silver clay can also be re-used for bronze clay projects. You just have to clean them thoroughly to avoid contamination.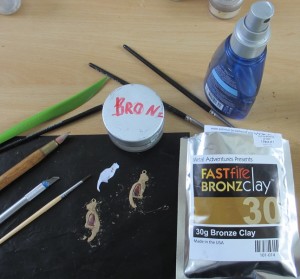
So here we go, following the same procedure as with pmc silver. First, shaping. The bronze clay feels different from silver clay: a bit drier and not so elastic in the wet form. So I had to keep a water spray at hand to sprinkle water on the clay from time to time.
On the other hand bronze clay is marvelous in processing when it has dried up. Much stronger than silver clay! You can even try to bend it when it is half-dry.
I was very happy when I shaped my first series of bronze clay projects. I thought: all you need to do now, is to fire them, Was it that easy?! Firing Bronze Clay seems to be the hardest part of the whole process.
And then I went on the internet and read stories of failed bronze clay projects. There are basically two things which can go wrong: either the sintering is not complete (then the temperature might be too low) or the piece gets all kinds of blisters (then the temperature is probably too high). But it is not just temperature: everything seems to matter. The ramp speed of heating up the kiln, the thickness of the activated carbon layer underneath and around the piece, even the distance between the container and the door of the kiln.
You can follow a specialists’ tutorial on firin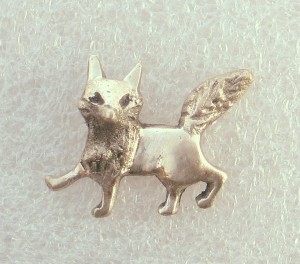 g the Bronze Clay. But I found it too complicated. Priming the carbon by sieving… my atelier is dusty enough!
So I just followed the manual inserted in the Bronze Clay package. Sacrificed one of my pieces having the necessary specs (at least 30x10x1 mm) as a test piece, put it on a 1,5 cm thick layer of carbon, covered it with another 1,5 cm of carbon, closed the container, but not hermetically (my container is handmade so it does not close hermetically by itself), inserted the container into the kiln on supports to improve air circulation, set up the ramp speed of 830°/hr, firing temp of 830° and firing time of 1 hour.
And after two hours of total firing time (including ramp-up time) this fox was ready and OK. Yes, it did sinter. I did not perform the recommended bending test on it, but when processing it with abrasive tools it became clear that the sintering has been complete. I have had experience with not-sintered pieces before, so I know how they look like and how they behave in processing.
This fox shows no (large) blisters either. You can see some microscopic dots (the pic is 20x the size!) but they can also be due to the fact that the piece has not been polished thoroughly before firing. Just because it was meant to be a test piece.
My next challenge will be firing several and/or larger bronze clay projects (together). To be continued.
But today… I say….hip hip hooray… my first FASTfire bronze clay. Wow, it rhymes!
Leave a Reply