How to make a copper rose for jewelry
Goldstone is the stone of ambition. It inspired me to make this 1 cm copper rose for jewelry. The rose has been soldered to the copper wire. The wire has been wrapped around the stone. A hole has been drilled in the stone to make the hold tight and secure. A beautiful pendant has been born.
And now the story of the rose. After googling I found this great tutorial how to make a copper rose in 8 easy steps. Sized to impress, mainly for decorative purposes. With enthusiastic comments and photos underneath. All of them showing a life-size rose. But my ambition was to make it a tiny pendant. It means I had to adjust the instructable.
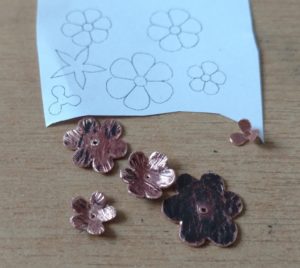
First I scaled down the pattern on the PC. Thanks to the author of the instructable (under a nick vbow) the pattern is well measured and centered. Though some of the comments advise skipping one petal round, I decided to go for the full set of petals, including the sepal. (I love this new word).
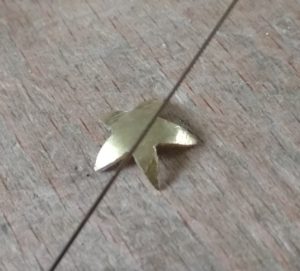
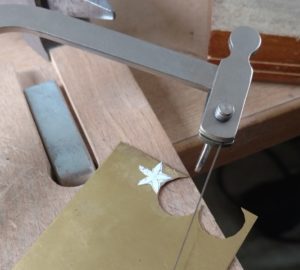
But instead of cutting them out of metal sheet like I did cut the pattern out of paper, I decided to cut them with a jewelry saw. A 22 g (0.6 mm) sheet is just a bit too thick for such intricate shapes. The shears can deform the shape or leave deep cuts. Fast but less reliable.
The jewelry saw is also fine for applying the texture. The hammer and chisel would not work with such small shapes either.
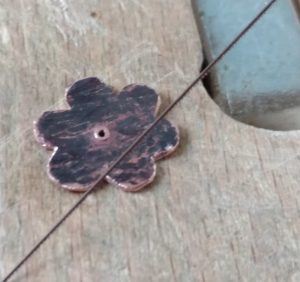
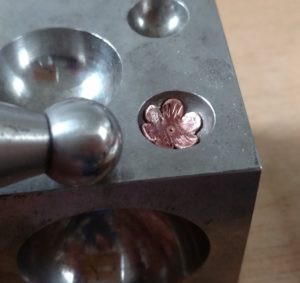
Since the texture is on the inner side of the petals, but on the outer side of the sepal, the cutting (or scratching) can be done either on the flat or on the bent shape. I thought it might be easier to make the petals and the sepal slightly domed. It would make bending of the petals easier after the assembly. This is where a dapping block comes handy.
After all the parts have been cut out and textured they had to be assembled. Unlike what the instructable says, my rose was not to be welded onto a steel rod. Just soldered to a copper wire, long enough to be wrapped around the stone.
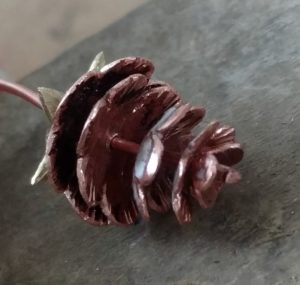
The point is that copper is soft and gets even softer after heating. And the petals do rattle because even the hole gets expanded and less tight after heating. To secure the petals a few small soldering spots on the bottom and on the top are not enough. They kept on rattling. So I did do soldering in the middle bunches of petals. After that, I proceeded with bending the petals. To be honest, the sepal could have been skipped because it can be barely seen in my design. But I just loved the idea and the word too.
After the rose had been finished the only thing to do was to wrap the stone. I like the result. The copper flecks in the goldstone match copper nicely. The whole necklace can now be seen here.

What are the lessons learned from the project “how to make a copper rose for jewelry”?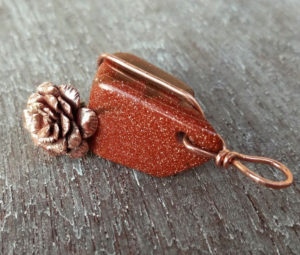
Making something in a small version is not just scaling down. It requires different tools and techniques. I used mainly jewelers tools and techniques for this rose. You also need to be aware of the final use of the piece. Will it be a standalone jewelry piece? Or assembled? With a stone? Beads? Worn on a chain? You really need to keep in mind all these things.
Thank you vbow for a great instructable!
Leave a Reply