The ultimate usage of precious metal clay – of any clay – is for 3D sculpturing. Actually it is a shame to use this precious material for flat shapes which can be cut from sterling silver sheet. The sculptures from silver clay can be perfectionated indefinitely (it is important to know where to stop) by filing, carving, sanding, polishing and burnishing them. Shaping pmc is an art in itself.
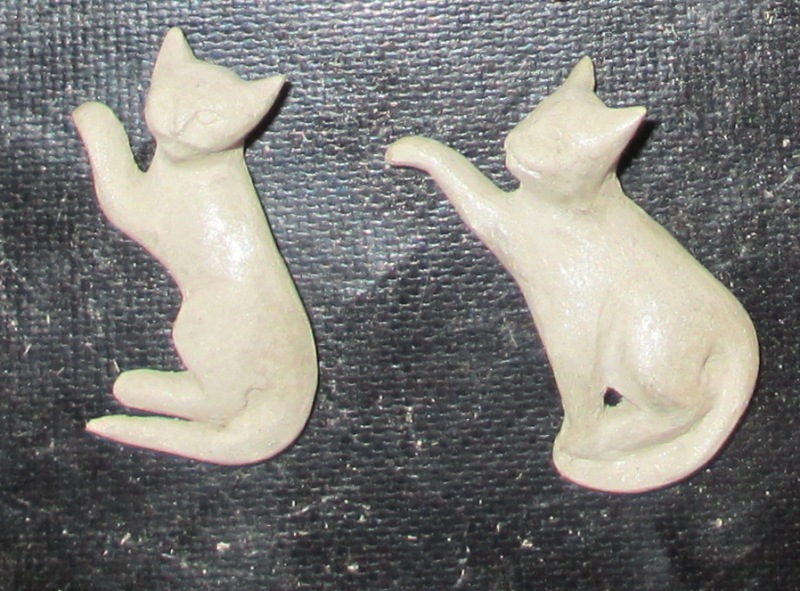
When I form the figures from wet clay, I use the rubber-tipped clay shapers just to indicate the general outline. The curves and bends are important, since when the figures dry up, they lose their flexibility. Proportions are important too, but they can always be adjusted during the fine shaping stage. The figures are very rough, as can be seen below.


The clay must DRY UP very well to be ready for further processing. Wet clay makes filing very difficult (and sanding – virtually impossible), the files get clogged, and, besides, the figures themselves can easily break. So be patient and let them dry at least for 24 hours.
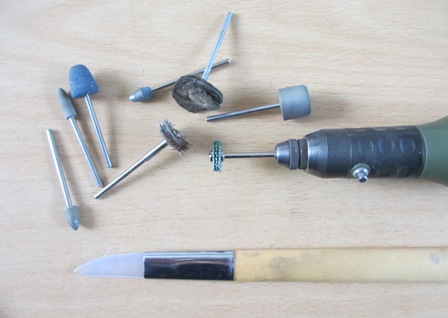
I use the following tools for the fine shaping work: needle files, carving tools, rubber-tipped clay shapers (for building up) and last but not least sanding paper – from 400 to 2000 grit. Usually I start with filing, holding the figure above the sawdust collecting pot. But the dust is everywhere, so I brush it off from time to time with a (dedicated) hard toothbrush. The dust is a perfect building-up material, so if some parts need to to become more prominent, I just dip the rubber tip of the clay shaper in water, pick up some dust, make a slurry and apply it where necessary. The building-up is best done in layers, drying the clay with a hair-dryer in between.
 |
| All these figures were made from 25 g of PMC |
After the filing and building-up have been done, I start with more fine detail, using carving tools, but also the sanding paper. The sanding paper is a perfect shaping tool, but it should be folded for more strength. That’s what you see on the picture – all these folded paper pieces.
Sanding paper can also be used on very thin figures. In this case sanding must be done extremely carefully. I always support the figure with the fingers at the point of maximal pressure and sand in the longitudinal direction (not transversely).
 The sanding starts with 400 grit and goes up to 2000. The quality of the sanding paper is essential: if the grits peel off, they mix with the silver clay dust, thus “contaminating” it. The last sanding stage is actually polishing. Polishing greenware does not replace the fine polishing of silver, but it helps to save the time and tools, the fine dust can be collected and recycled, and last but not least, it is possible to create the juxtaposition of surfaces to make the sculptures more 3D and “alive”.
Keep in mind that silver clay figures will shrink after firing, making the detail even finer.
The fired pieces are covered with a matte layer of fine silver grain, so to remove it, a steel brush is used. After that the final fine polishing can start. I am basically a lazy person, so I use a rotatory tool for all after-firing polishing . I love these bristle discs which can get in every nook and cranny. The agate burnisher is used not very often, just for highlighting. But I have discovered that it can be handy for smoothing the bezel around the stone.
There are different opinions about polishing fine silver pieces after firing. Many PMC artists prefer to leave their work natural and a bit rough, just highlighting it with a burnisher. I prefer to have my sculptures high-polished just because it makes them more expressive.

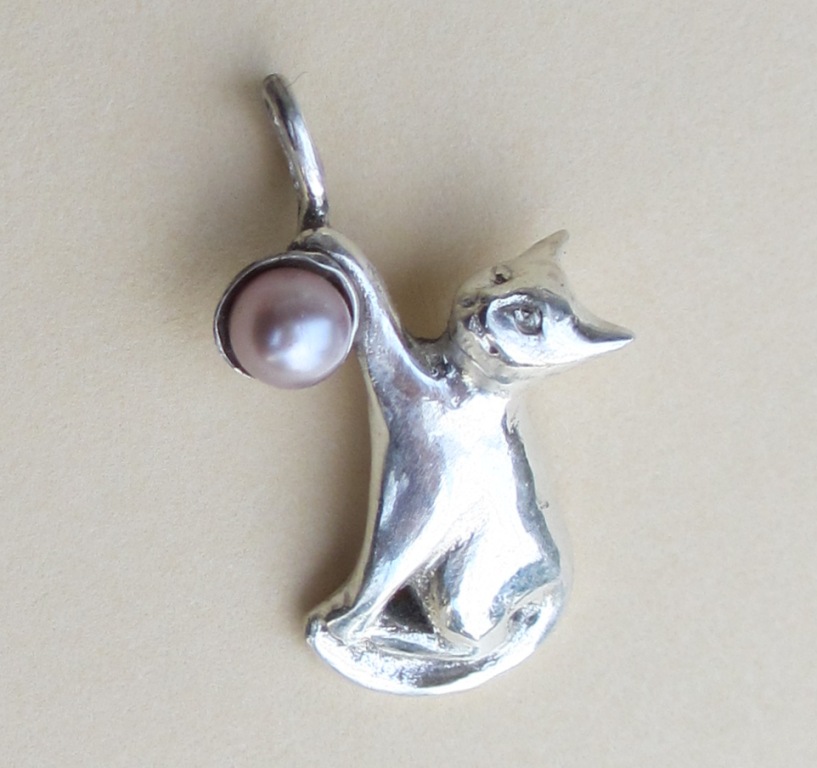
The cats are finished, shining and eager to meet their wearer. They were quite difficult to photograph, since light falling from a different angle creates a totally different impression. But this is the magical shine which makes silver sculpture so “alive”.
Leave a Reply