How to be your own model and photographer for jewelry
A hobby jeweler has a life full of financial choices. How much to spend on the material, tools, and… last but not least… marketing. Commission fees, promotion, listing ads – it all costs money. No wonder that photography and graphic design are the closing entries on the budget list. At least, we think if we can make beautiful jewelry, we can take beautiful pictures too. With modern devices, it looks as if everyone can be a photographer. And if a picture is not 100% you can always enhance it.
What about models then? Some jewelry makers use their friends or family members as models. Or even pets. The nice thing about being a female jewelry maker is that you can pretty much act as your own model. You don’t need anyone else but yourself. All on your own.
But it is not that easy. The hand of a maker is not the hand of a model, as I have written here. Jewelry making and perfect manicure do not go together well.
And there is another thing called AGE.When I see all those pictures of young girls showing their own jewelry I just think: they don’t need anything to decorate themselves. No makeup, no jewels. They are pretty as they are with smooth, unblemished, unwrinkled skin. And here I am, an aging woman who started her hobby a little bit too late in life. All on my own. Without a professional photographer or a visage/marketing specialist. With the cell phone and picture editing software as my only friends.
So now I will tell how to be your own model and photographer.
Before you start, here are the three basics:
1. Dare
2. Love yourself
3. Experiment
You will need reasonably bright weather – and bright mood too. The best light is not direct, but soft and rather low. The morning is the best time. Or near sunset. Outdoors photographing is nice provided there is no wind. If your jewelry has moving parts (pendants, dangles, charms), don’t move. Preferably hold your breath for a moment. Moving pendants will be less sharp. Support them when necessary.
Make as many shots as possible. 80-90% of them will be deleted anyway. The selection procedure is better to be done on a desktop monitor. I zoom the pictures up to 100% and select the sharpest. Because the rest is easy to fix.
The first (and often the only) editing to be made is CROP
Cut off everything irrelevant. Focus on the piece. This is also a very honest type of editing. I use is to send pictures to people who placed custom orders. Because they deserve not even 100% but 150% honesty in every detail.
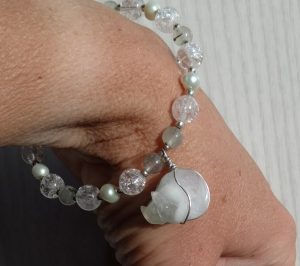
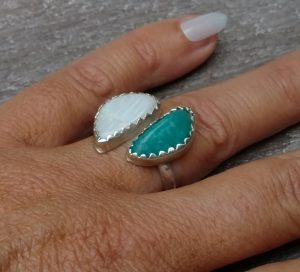
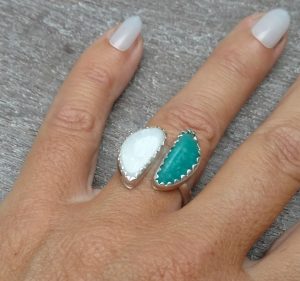
Photographing rings (and bracelets) is quite simple since you can easily focus on your own hand. I use fake nails, without gluing them onto the nails, because I hate long nails anyway. They are not always 100% aligning. Just crop the parts which are not perfect. Rotate the picture to find the perfect crop position.
The pictures of the amazonite ring have not been edited more than just crop. And they look quite reasonable.
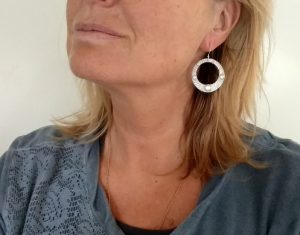
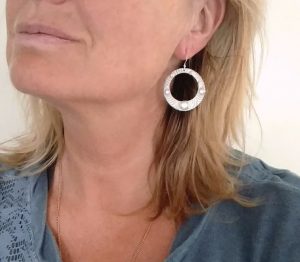
Earrings are quite challenging to photograph. A picture of an earring worn “on ear” is essential since this is the only picture which can give an idea of how an earring will fit the ear. A selfie of an earring is quite challenging because you have to take it from the side. And don’t move (or breathe). Especially with dangles. Cause they keep on dangling and making the image unsharp.
Another problem is that this is a close-up picture which will inevitably show all irregularities of your skin. A close-up of imperfections. So good ‘makeup’ editing is essential. I don’t do it on the jewelry piece, just on my face, removing blemishes and wrinkles.
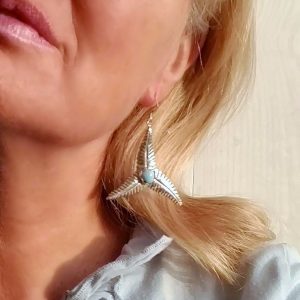
Most times I crop my face off for the reasons of privacy. But sometimes it is nice to show at least a part of it. For instance, when you have caught a nice smile.
I have experimented with distorting my face the way they do with criminals to make them less recognizable. The result can be seen in the feature photo of this blog.
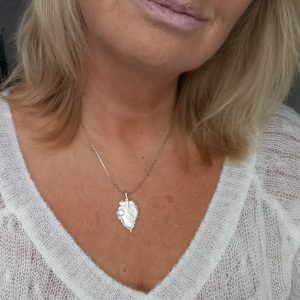
Pendants are quite similar to earrings.With the only difference that the pictures are taken upfront and that you can (and should) experiment more with different garments. Pendants and necklaces should match the clothing. There is a lot to tell about the match between the face type and the necklace shape (triangle, V, square, oval, teardrop), but this is a topic for my next blog. I hope I could share an idea of how to be your own model and photographer for jewelry. It is easy and technology is your best friend.
Leave a Reply